
This topic may sound funny but it can be done. Have you ever tried deleting recycle bin from the desktop before? Back in 2008, I had a call from a friend who looked very worried with the reason being that, he has deleted the recycle bin from his desktop. I was like, OMG!!! How’s that possible?
I then researched about that and figured out how it can be done. In this simple tutorial, I’m going to take you through the step by step procedure on how to remove recycle bin from desktop in Windows 7, 8 and 10
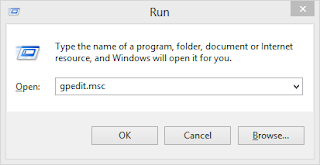
1. Press Win + R for Run, type gpedit.msc in the text field and click OK or press Enter
2. In the left pane of the Local Group Policy Editor, Under the User Configuration option, Expand the Administrative Templates tree
3. Click on the subtree Desktop
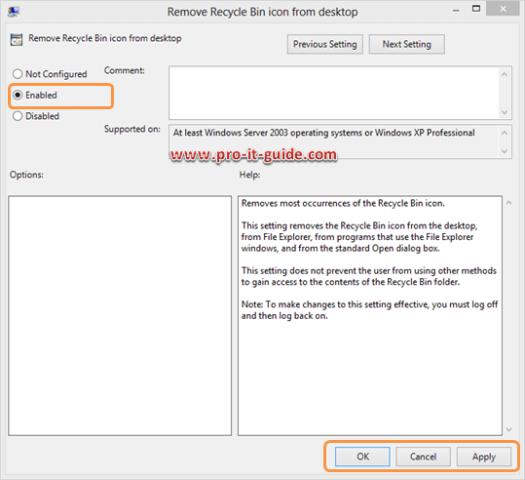
4. On the right panel, double click on the Remove Recycle Bin icon from desktop option

5. In the properties window, check Enabled and click on Apply then finally OK to exit the window.
6. Close the Local Group Policy Editor and Log off
When you Log On, you will find out that the Recycle Bin has been successfully removed from the desktop.
If you are a windows 10 user, then follow these 3 steps
1. Click the Start button and select Settings.
2. Select Personalization; choose Themes then Desktop icon settings.
3. Uncheck the Recycle Bin checkbox
4. Click Apply.
I hope you found this tutorial helpful. Let’s get interactive by dropping your questions and suggestions in the comments box below. Enjoy!!!
Level: Intermediate
Comments
Post a Comment